Level 001: The Lost Forest Puzzle Level 1 (Updated) | Easy Walkthrough & Solution
Quick, SEO-friendly guide to solving **The Lost Forest Puzzle Level 1 (Updated) | Easy Walkthrough & Solution**: place the crystal, reveal the hidden letters, enter the code, and confirm to clear the level in seconds.
Level overview
Quick, SEO-friendly guide to solving The Lost Forest Puzzle Level 1 (Updated) | Easy Walkthrough & Solution: place the crystal, reveal the hidden letters, enter the code, and confirm to clear the level in seconds.
Step 1. Pick up the crystal

Start by dragging the crystal into the scene to begin the puzzle. In The Lost Forest Puzzle Level 1 (Updated) | Easy Walkthrough & Solution, touch and pull the gem from the bottom right toward the top slot so it snaps into place.
Step 2. Place the crystal in the top slot
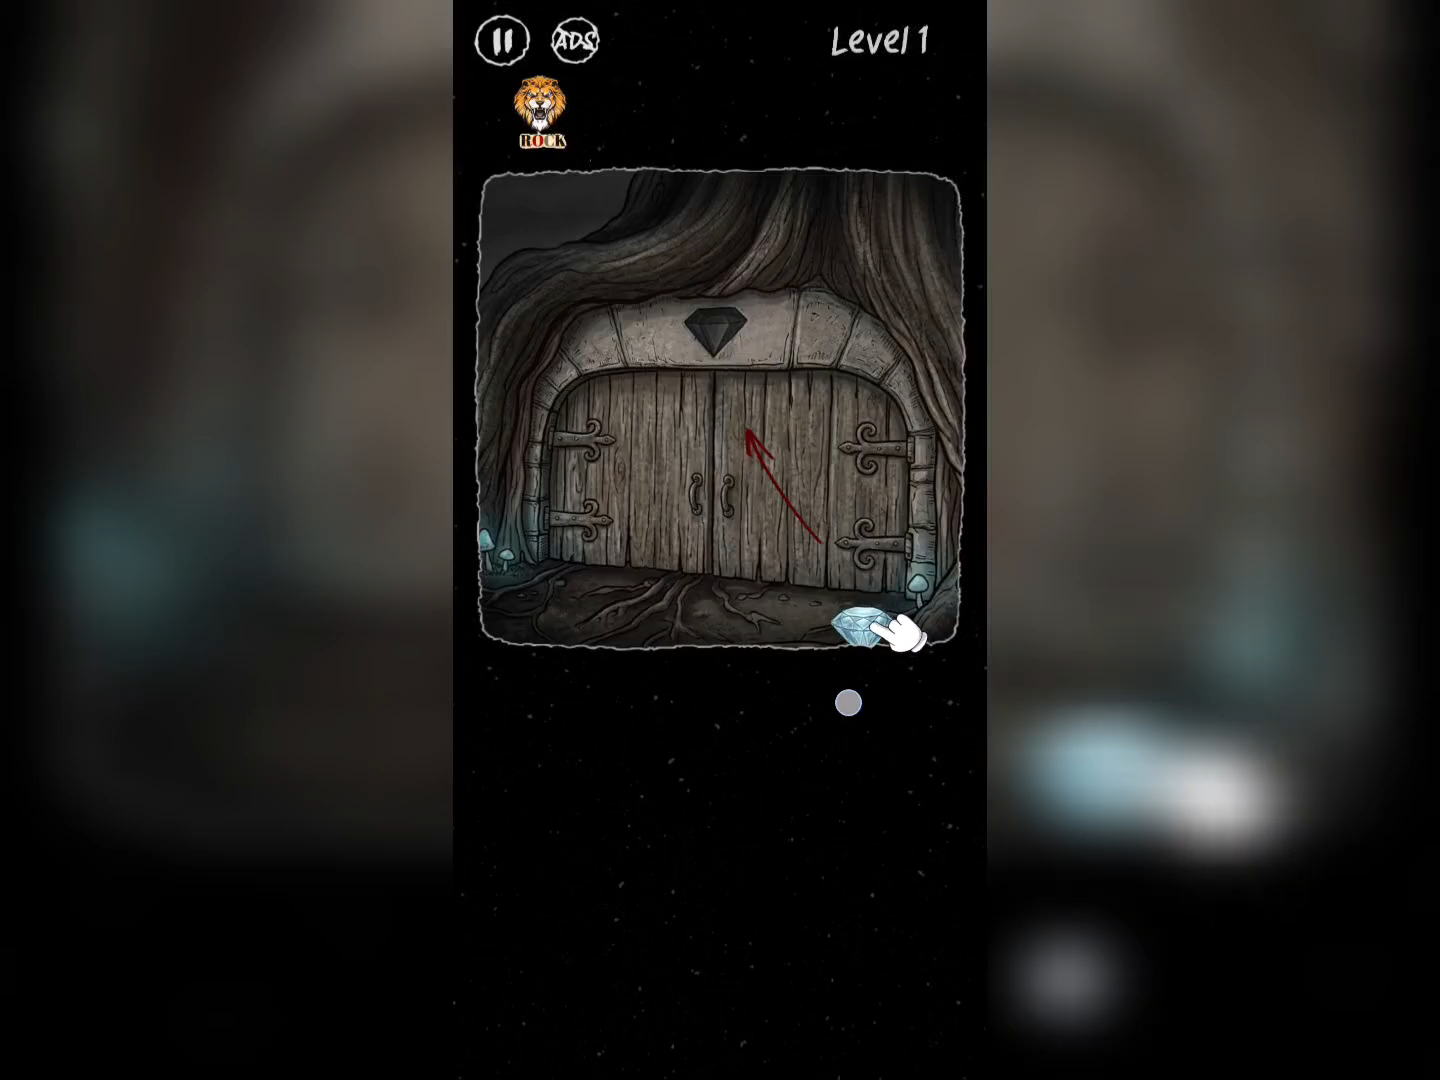
Drop the crystal into the top recess to make it glow; this reveals hidden clues behind the door. The screenshot demonstrates the gem sitting in the top slot as required in The Lost Forest Puzzle Level 1 (Updated) | Easy Walkthrough & Solution before letters appear.
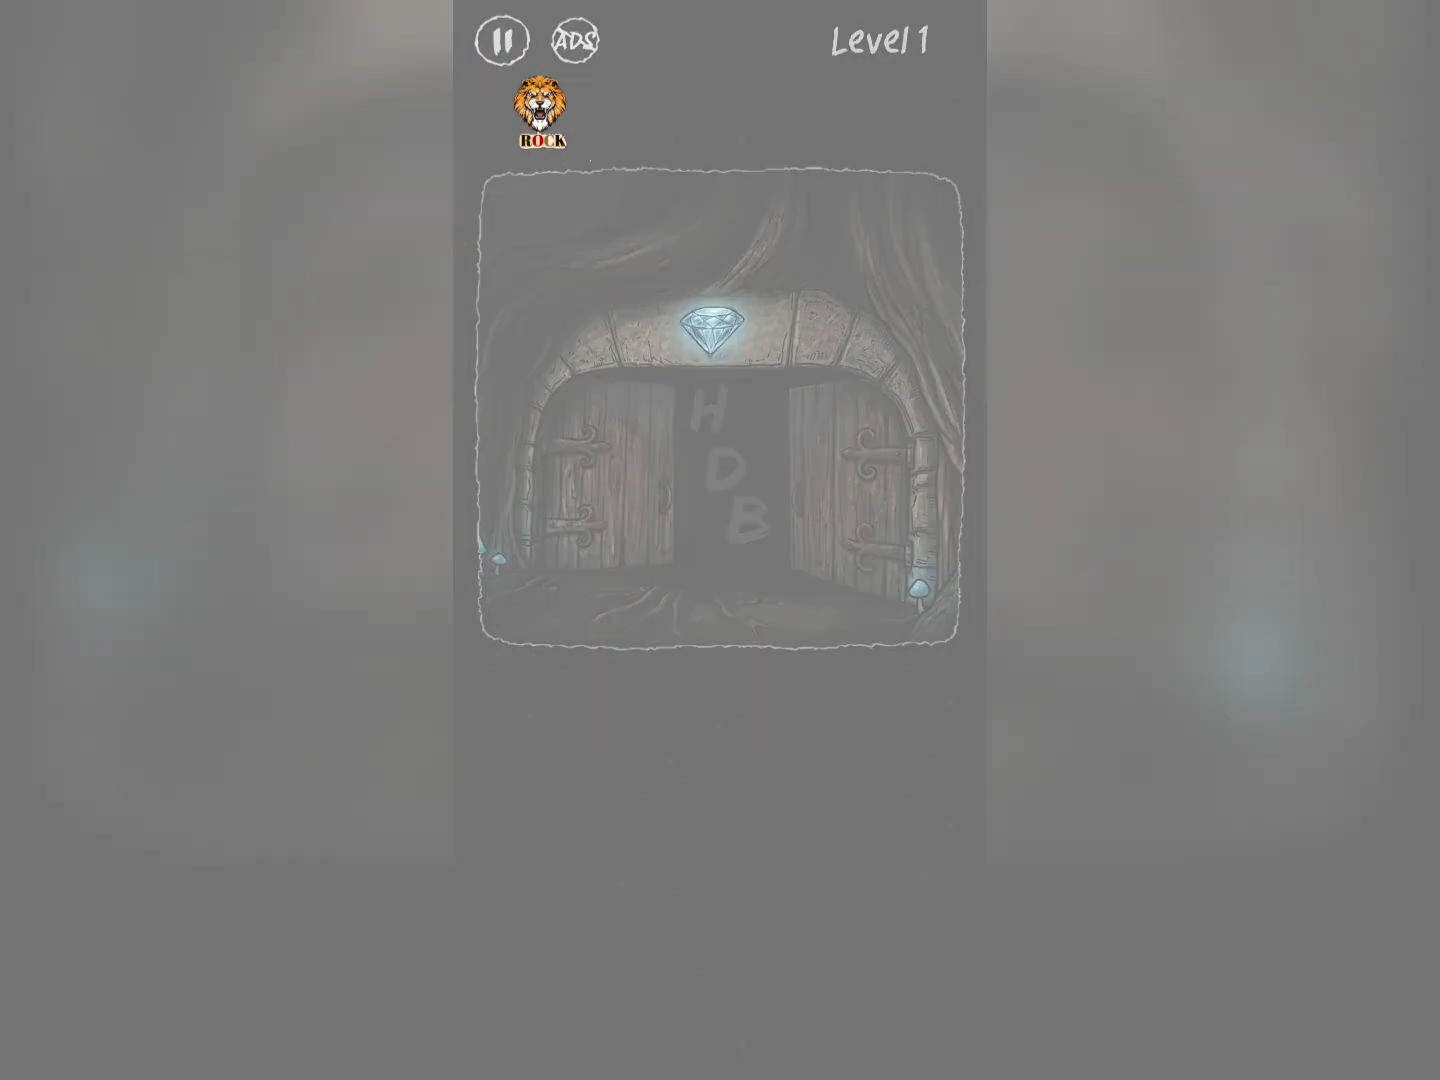
Step 3. Read the revealed letters and select them

With the crystal in place the letters appear on the door (H, D, B); tap the corresponding letters on the wheel in that order. Follow the visible letters in The Lost Forest Puzzle Level 1 (Updated) | Easy Walkthrough & Solution and select H first as shown, then D and B to match the clue.
Step 4. Confirm the code to clear the level
After selecting the letters in The Lost Forest Puzzle Level 1 (Updated) | Easy Walkthrough & Solution, press the confirm/hourglass button to submit the code and open the door. The image shows the final tap on the confirm icon to complete the puzzle.
Extra tip
- The Lost Forest Puzzle Level 1 (Updated) | Easy Walkthrough & Solution Make sure the crystal snaps fully into the top slot before trying letters.
- If the letter wheel is unclear, tap slowly to highlight each choice.
- Tap the hourglass/confirm icon only after the letters appear to register the input.